Wednesday, January 8, 2014

Carving a luna moth stamp

I have had this stamp material with a luna moth drawn on it since April, when I attended Pamela Underwood's "Living with Images as Companions" workshop at her beautiful Turtle Crow Studio in Austin. I finally decided to tackle carving, and learned two (probably more) things.

1 -- It's not that hard and it does not take very long. I spent a total of 45 minutes carving it.
2 -- It's going to take some practice to develop this skill.
3 -- I could get into this! Carving is relaxing and meditative. I listened to Ray Montagne on Pandora and got into my zone.

I am satisfied with the stamp, but it has lots of warts that don't show up well in the photo. Curves are tricky. Removing stamp material cleanly from the edges of the image takes concentration and practice.
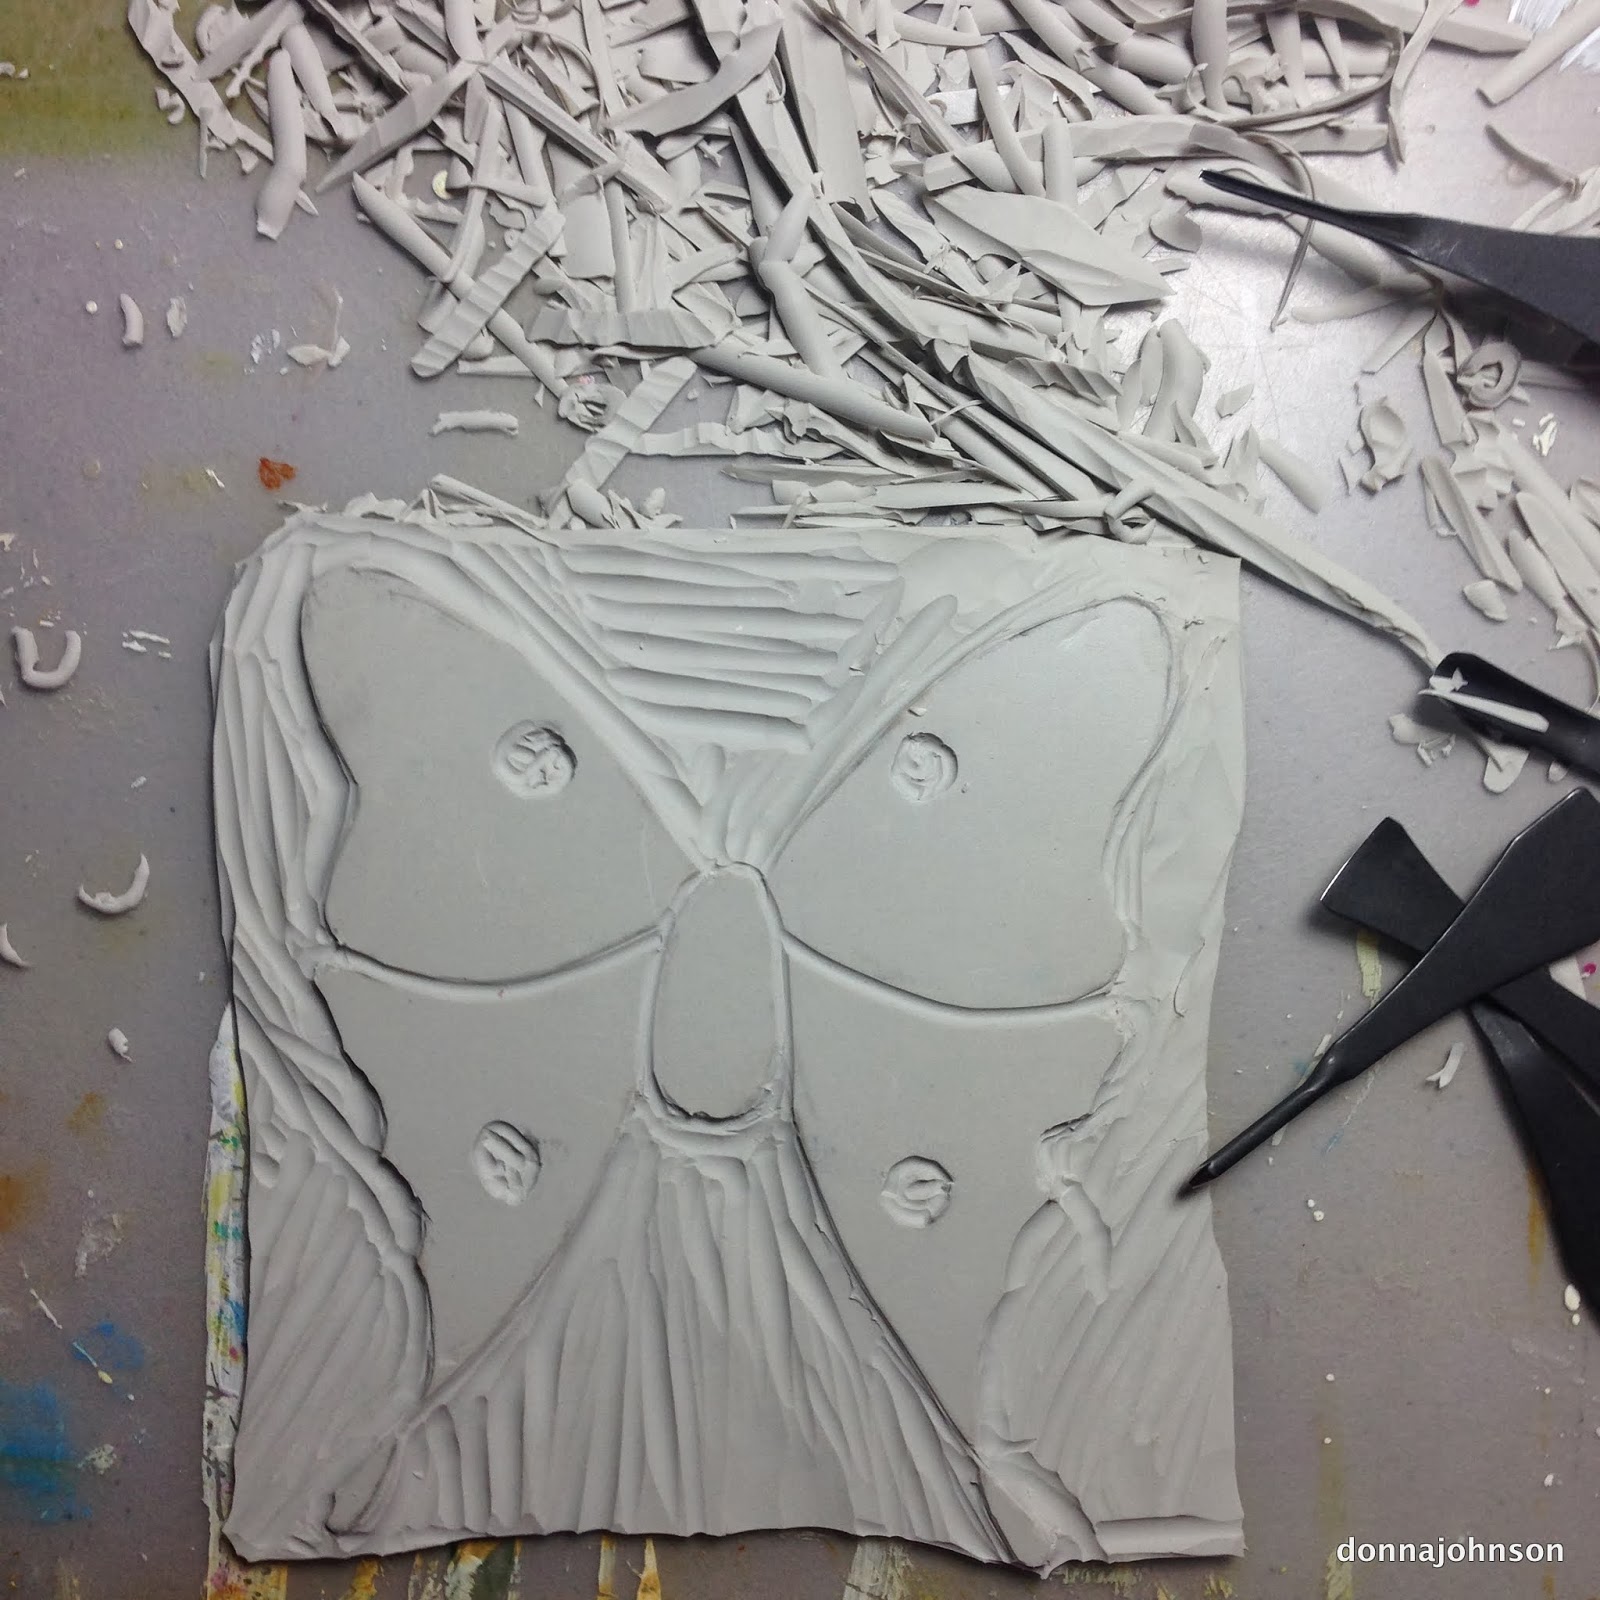
Mostly finished

Finished stamp with a few pen details -- stamp pad was a bit dried out.


Now to figure out where to get a luna-moth-green stamp pad. Any ideas?

Update: Someone asked me how I will stabilize this stamp. I don't plan to stabilize it -- I place it flat on a table and ink it, then place the paper on the stamp. It's about 6" tall, and storing a block of wood or piece of foam core that large would take lots of space.


Tuesday, January 7, 2014

Tiny envelopes

I have been bitten by the expressive art journaling, Gelli mono printing, stenciling, stamping, lettering bug. I am working on four art journals, a bit at a time. YouTube is full of video tutorials made by journalers who actually finish spreads. I wander through my books, adding a bit here and there, and finishing a spread is slow going. I haven't written about this because I thought I should present finished projects, not works in progress. I have changed my mind. The photos below are unfinished pages with lots of tiny envelopes. Each envelope contains, or will contain, an insert with words on it. Since this spread is dedicated to gratitude, the words are to be phrases of thanks.

I have a general shape I use to cut out the envelopes freehand. It's one of those mindless tasks that can be done while watching tv (did I mention mindless?). Usually I cut a pile of them from Gelli printed deli paper, and glue the tabs down later. (I did a google search for "gelli printed deli paper" so that I could post a link here, but for some reason google is not showing the link in the address line in Safari, so you'll have to do your own search if you want to learn more.)

Tiny envelope spread in art journal

Close up of tiny envelopes

If you have the urge to play with art supplies in your very own journal, I say go for it. Be warned, it is addictive!


Saturday, July 27, 2013

Gelli print collage backgrounds

I am having so much fun with this!


So there they are, a few of the backgrounds I've made. Next comes more detail and some writing. I sort of want to leave them as is. 


Friday, July 19, 2013

Monoprint collage

If anyone had told me that I would all but abandon crazy quilting for mono printing and collage, I would have said, "No way!". That was before I found the Gelli plate, a nifty device that makes creating very cool prints easy peasy. Here are a few of the prints I am working with.


Here is my Gelli printing workstation. 


And this is a collaged page in my art journal. I intended to use this as a background, but I might just leave it as is. I quite like it. 


Lastly, here are a few images of other pages in my journal.


Now you go make some art!


Tuesday, July 16, 2013

Time keeps slipping into the future

My goodness, I am a lazy an inconsistent blogger. I have good intentions, I really do. When I start a new art project I vow to photograph it every step of the way. I dream of creating a blog post that will inspire others to take my idea and run with it, having fun every step of the way. Somehow it gets away from me and before I know it I have cruised through crucial steps with no images. I don't think I am going to change. I don't even want to change. I love making art. Blogging about it, not so much. For now -- and isn't that what everything is, just for now -- when I get around to it, I will post photos of what I am working on. I encourage you to write to me, or post a comment if you would like to know how I did it. I hope you will. Even though I am lazy inconsistent, I would love to connect with you.

Here are a couple of journal pages I am working on. They are not finished. I don't know when or if they will be. I do them purely for pleasure as the whim strikes me. I hope you enjoy them.


Wednesday, December 19, 2012

Celebrating a Stress Free Holiday Season with My New Friend Jack

I have a new friend and we have had a fine time together during this holiday time. I have not experienced one bit of stress, not one, tiny bit, thanks to his help. From choosing gifts to sending cards to cookie exchanges to gifts for needy community members, Jack has helped me cope calmly and gracefully. You may know Jack -- his last name is Shit. Jack Shit. As in "I am not doing Jack Shit for the holidays."

When the urge to bake hits, Jack says, "Still your mind! You do not want to go to the store to buy supplies, spend the evening baking, and run around tomorrow delivering them to your fat friends who don't need to eat them. Put on your flannel jammies, flip on the tv and watch a movie. Maybe someone will drop by with some cookies for you."

When I was asked to contribute clothing for needy babies, Jack said, "They'll take cash, you know." So that's what they got. Those babies won't know or care. They'd rather have candy anyway.

Purchasing gifts for friends and family? I was contemplating shopping trips, trekking through malls, driving long distances to get just the right thing. That smarty Jack said, "Wait around for a last minute deal to come in your email and order online." Brilliant! Took me about 30 minutes and that included typing in their names and addresses for delivery.

Christmas cards? Jack advised that I would be killing trees in the interest of sending meaningless greetings to people I talk to on the phone anyway. Everyone else would be thrilled with a lovely digital card from Jacquie Lawson. Jack knows his stuff!

Jack's wisdom includes, "All this so-called seasonal kindness is claptrap. Be good to everyone all the time and relax with a clear conscience in December while everyone else runs around like maniacs going in debt."

He has urged, "Girl, there is no Santa Claus, hell, even Jesus would not approve of Corporate Christmases. Don't do it for them, don't do it at all. That's called not doing Jack Shit!"

Jack has been a good and true friend. To show him my gratitude I am going to do something extra special. Just as he recommends, I am not doing Jack Shit for him.


Tuesday, December 18, 2012

Carving a Background Stamp


While shoving strolling through the 2011 International Quilt Festival shopping are, I ran across the colouricious.com exhibit and found this lovely Indian Printing Block. I was delighted to take it home with me, where it sat unused for about a year.

I had an idea that a solid background stamp would add some interest to the original design, and that I should carve this stamp. I was fortunate to attend, also in 2011, Jane LaFazio and Pamela Underwood's Lavender Sage Art Retreat in Austin, TX, where we carved stamps that we designed. Armed with these skills, I jumped right in.

Here's is what I used:
Speedball Carving Set (carving tool and stamp block blank)
tissue paper
oil pastel in light brown color
stylus for tracing
Stayz-on stamp pads in several contrasting colors
Muslin and paper

Original stamp on tissue paper, outlined with oil pastel
First, I stamped the original stamp on tissue paper. (above) I outlined the shape in oil pastel, which is soft and smeary, just what I wanted for this job. I flipped the design over on to a stamp carving blank block and used a stylus to go over the outline. The smeary oil pastel design was transferred to the block. (left) Using my basic little Speedball stamp carving tool, I began removing the portions of the block that I did not want to include in the image. (left)
Here's what it looked like when I finished carving it and slapped a purple stamp pad on it. It was not difficult to carve because I kept the shape simple, and the image stamped beautifully.

What I have learned about the original stamp is that it does not work well on paper (at least not index cards) because the detail is lost, but that it works much better on fabric, although not as well as I would like. I think this might have had do do with the surface upon which I was stamping. I used a dropcloth over a cutting board and it may have been too hard. 
Stamps on index cards, much of the detail stamp is lost.
Background and original stamps on fabric;
better but not as detailed as I would like.
In conclusion, I think I can get the image that I want by stamping on fabric on a padded surface, yet to be determined. If you give this a try, please comment and let us know what worked best for you.

Update: After all my experimentation, I discovered a video on the colouricious.com site that helped immensely: Inspired Block Printing with Jamie Malden.