Showing posts with label collage. Show all posts

Saturday, April 26, 2014

Studies in collage with walnut inks and cereal box journal update

I've had these walnut inks sitting around for a long time. I had to have them but I've never been sure what to do with them. (I know I am not the only person out there who is compelled to buy art supplies before having a use for them!) They can't be used on non-porous surfaces (or they will never dry), so I had limited use for them. After being inspired by Jane Davies to stamp, paint, and mark on tissue paper for use in collage it finally occurred to me to spray the inks on the tissue. I love the result. It's easy to do. Spray ink on tissue paper. Tear up paper. Stick it down.

Tsukineko Walnut Ink Sprays
The colors in this set are Terra Cotta, Eucalyptus, Java, and Walnut. I think they are meant to be used for aging or antiquing papers. Tsukineko calls them "craft inks" on their website.

Torn tissue paper
I started with opaque papers, mostly ones with words, adhered to some drawing paper about 9"x12". Of course I forgot to photograph that part.

I ripped up the tissue paper and started sticking it down, paying very little attention to what went where. I added the translucent tissue paper over the opaque papers and I like the look very much. It knocks back the white and leaves the text visible. 

The tissue paper on the left, in the image above, was stamped using a wooden stamp with Golden Iridescent Copper Light (Fine). I am adding it into the collage because it it's curvy, and because I love the copper color. You can see a bit of it in Collage detail (1) below. Not Collage (1), Collage detail (1).

Collage (1)
The tissue paper I used had a strong grain in one direction and I ended up with lots of pieces with straight-ish edges. I positioned the most extreme ones against the edges of the paper.

Collage detail (1)
I love the transparency, well, technically I guess it's translucency, of the tissue paper. Because the inks do not spray uniformly, I was able to choose from very dark to very light coverage.
Collage detail (2)
There is no rhyme, reason, or composition here. Just randomly placed paper. It's not necessary because I will paint over much of this. It takes great courage, but I am learning to paint over collage, using the collage to inform my painting decisions. (Don't you love that? Informed. Me?) The class that I took from Jane last month at Art & Soul in Kansas City was filled with instruction that has made me much more confident about painting over my exceptionally wonderful precious collages.

Cereal Box Journal 

The cereal box journal slowly marches on. When I add to the pages, I use paint left over after a "real" painting session and collaged junk. I experiment with things I might want to do in a project: techniques, stamps, all kinds of stuff.

Cereal box journal detail (1)
This is a label torn off a beer carton. There was lots of nice narrowly corrugated cardboard left for use as a texturing tool. My son was nice enough to give the carton to me as I do not buy beer by the case.

Cereal box journal detail (2)
I sprayed over a hare mask with Dylusions ink spray. I am still a little leery about using Dylusions because they are water-activated and they smear in the kind of work I do. Love the colors, though. I think my choices are to seal it with a fixative spray or switch to acrylic inks and settle for a different look.

Cereal box journal spread
I have been sick for a week, but I think I am on the mend now. It will be great to get back in the studio instead of sitting in a chair and watching netflix while reading the interwebs. I can only take so much of that stuff and I reached my limit last Monday.


Tuesday, April 1, 2014

Cereal Box Journal

I have learned so much from other people, too many to remember to list them here. I do want to mention Jane LaFazio, who introduced me to cereal box journals, and Jane Davies, who taught me about lifting paint. I have learned a great deal more than that from Jane and Jane. They are both brilliant artists and excellent teachers, and their classes are fun and filled with new ideas. Check out their workshops and online classes on their websites!

Okay, my cereal box journal. I save cereal and cracker boxes and cut off the sides and ends to make pages. I punch holes in them so that I can hold them together with rings.

Art journal made from cereal boxes.

Art journal made from cereal boxes.
As you can see, we eat lots of cereal
and crackers around my house.
I am working on collage and paint pieces (not in the journal, on printmaking paper), and sometimes I want to remove paint that I have applied. I grab a cereal box page or a piece of drawing paper and blot to lift the paint. I love the interesting effect of this. The cereal box by-product is just a bonus! When I have blotted enough that the CB page is covered, I make marks on it and sometimes I add more paint.

Art journal pages

These finished pages are fun to play with. I have no stake in how they look. They do not have to be perfect! If I end up with something I hate (it happened once) I can either paint or gesso over it or throw it in the trash.

Sometimes I use cheap drawing paper to lift paint. I learned about this paper from Jane Davies. It is on her Favorite Materials web page.


I love to write on these pages. I overlap the writing so no one can read it (really, I say things I would never want anyone to read!), and I love the blocky squiggly effect.

Rather than punch holes in this paper, which I think would soon be destroyed by flipping through the heavy cardboard, I stick it on the CB pages with acrylic medium. I am sure PVA glue would be just fine, I just haven't had a bottle near me when I have been doing this. In this photo I have folded the drawing paper in half and wrapped it around the cardboard page.


I'll add some paint and some writing certainly, and maybe more. Whatever I do, I will enjoy doing it, and maybe learn some things that will help me be a better artist.

Friday, January 24, 2014

Moongazing Hares

I don't know what it is about hares and the moon that lures me in. Something just does. On a trip to London a lifetime ago, I found a little moongazing hare sculptural figure in a gift shop, I think it was the V&A. I have had it around at the edges of my awareness, tucked in a drawer or at the back of a shelf, for many years. 


The other day, while trying to read the entire internet in one sitting, I ran across an image of one of these creatures and have felt myself drawn back in. The hare represents regrowth and the fertility of spring, which seemed apt for the time of year and my age. At 67, I consider myself in the springtime of my old age, and am finding a growing energy in artistic creativity. If you want more information on these critters, here's what wikipedia has to say.

I googled for images and was not disappointed. Eventually, I chose my favorite and with PhotoShop and Illustrator managed to make a file that I could use with my Silhouette Cameo to cut a stencil.

This is not the stencil, it's the mask that came from the stencil.
This is the mask (the part that came away to make the stencil), and I think I am going to have lots of fun with this and my Gelli plate. (Note the textured papers beneath the mask. I am using them to remove paint from the Gelli and eventually they will wind up in a piece of art somewhere. Someone gave them to me but I believe they are anaglypta wallpaper and I might be able to get more from the paint store!)

This was made using the stencil.
Here's what my hare looks like stenciled on to an art journal page. I outlined it with a .35mm Energel pen, and I like that look, but the hare does not seem finished to me. I think I will gradually add paint to it until it is less translucent and stands out on its own more.

A few more pictures of the hare …

Gelli print on card stock using stencil and hand carved stamp.
It amuses me to make these hares in non-hare colors. I didn't realize that the spiral on the hare was layered over a spiral design on the background image until I made the print. Happy accident.

Gelli print on deli paper cut out and placed on existing collage.
This pink hare was stenciled on a piece of deli paper using the Gelli, then cut out and placed over an existing collage art journal page.


Monday, January 13, 2014

Stencil on Images journal page, made with Silhouette Cameo

I love Stencil Girl and The Crafters' Workshop, and making my own stencils won't replace their wonderful products; however, I wanted to try making stencils from my own designs so I bought a Silhouette Cameo. For those of you who have never heard of a Silhouette Cameo, it'a small machine that cuts shapes out of paper, vinyl film, card stock, fabric, and some other things, including plastic stencil material. I tried three or four different kinds of stencil materials, none of which worked with the machine, until I found this video on YouTube by Jamie Tardif. She recommended Show Offs stencil blanks, which can be purchased only at Hobby Lobby, and that is what I am using.

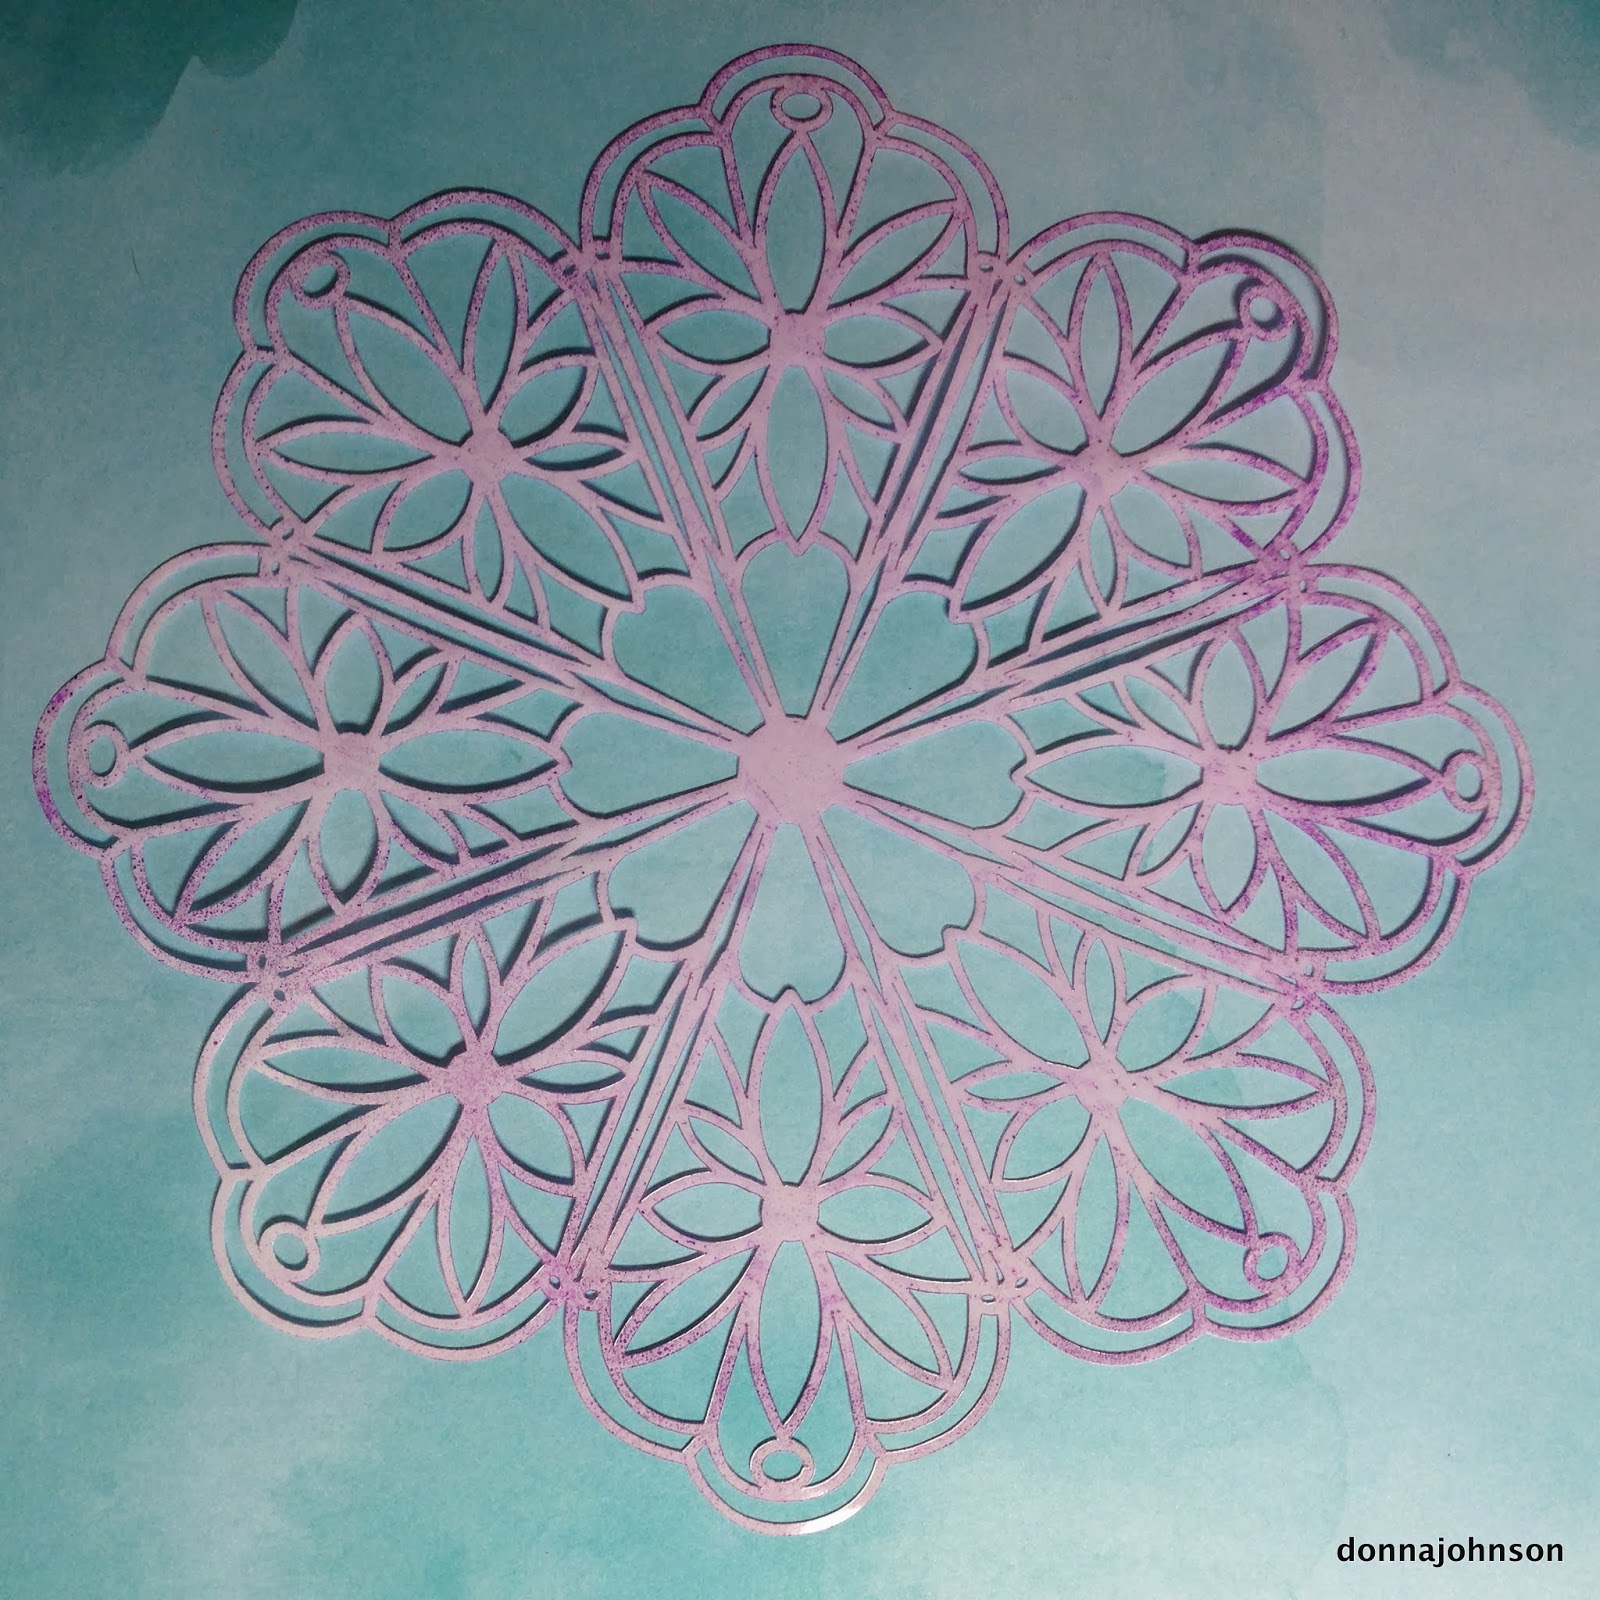
I still haven't made a stencil from my own design -- I need some remedial training on Adobe Illustrator or the software that comes with the machine. I did make the beautiful stencil pictured below, though. It's a design that I purchased from Silhouette called Echo Park Doily. The stencil material is not a lovely shade of lavender, that's from the Dylusions spray that I used. Read on ...

Silhouette Echo Park Doily
I used the chipboard setting on the Silhouette to cut this out. You have to do a lot of fiddling to get the machine set so that it will cut properly. 

Gelli printed collaged deli papers with stencil applied in purple
I put my Images journal in my non-OSHA approved paint booth (cardboard box) and got out the Dylusions Crushed Grape spray ink. You can see the stencil design at the bottom left corner of the top right quadrant. I deliberately sprayed only a part of the stencil. I did not want the doily to be the focal point on the page. I wiped some of it off after I sprayed it.

The page I sprayed on was coated with either Liquitex Liquid Matte Medium or ModPodge, I can't remember. The Dylusions beaded up a bit but I rolled a roll of paper towels over it to pick up the excess.
This design is on the paper towel that I put underneath.
I usually put a paper towel or piece of paper under the object to be sprayed. I have some beautiful papers that started life as a humble drip-catcher. I think I'll try tissue paper the next time I spray.

So there's today's quickie peek into the Silhouette Cameo and stenciling. If you want to learn more, watch Jamie's video (link in first paragraph). You can always leave a comment if you have a question and I'll try to answer it.

Now go make something daring. It doesn't count unless you make a mess.


Friday, January 10, 2014

Embracing 2014

The internet is buzzing with talk about choosing a word for the coming year instead of making resolutions. Choosing one word seems more practical than making a list of things I will never do. Here are some photos to verify that I have actually chosen a word, and not just fantasized about it.

An act of holding close with the arms,
an enclosure or encirclement,
eager acceptance. 
Here's the whole page.

This is the facing page. It's not finished.
Some technical stuff: The page backgrounds are Gelli-printed deli paper collages. The flowers and leaves are stencils, the peacock feather was cut out of scrapbook paper on a Silhouette Cameo cutting machine, the "mind body spirit" is from a Stencil Girls Stencil Club stencil designed by Jessica Sporn. The three round swirly patterns in dark pink, to the left of the peacock feather, were made by heating a foam "marshmallow" from Michaels with a heat gun, then pressing into a carved pipe bowl to make a stamp. In person, the pages have a fair amount of shimmer from a Wink of Stella brush pen and Daler & Rowney FW Acrylic Inks. I did all the lettering by hand, except for "mind body spirit", with Posca Paint Pens and a Pentel EnerGel .35mm pen. If you are new to art journaling, don't worry about acquiring all this stuff at first. It's expensive. I did not get all these supplies overnight. I've used Michaels 40% off coupons, Jo-Ann's online sales, and special offers wherever I can find them. Just use what you have and enjoy yourself!

Friday, July 19, 2013

Monoprint collage

If anyone had told me that I would all but abandon crazy quilting for mono printing and collage, I would have said, "No way!". That was before I found the Gelli plate, a nifty device that makes creating very cool prints easy peasy. Here are a few of the prints I am working with.


Here is my Gelli printing workstation. 


And this is a collaged page in my art journal. I intended to use this as a background, but I might just leave it as is. I quite like it. 


Lastly, here are a few images of other pages in my journal.


Now you go make some art!


Sunday, January 17, 2010

Art Journal


I am playing art with paper, paint, collage, crayons, pens, and pencils these days. I love working on my art journals for the same reason I love crazy quilting: the results are unpredictable and random. Unlike crazy quilting, however, the finished piece comes together very quickly.

The photo is a two page spread from one of my journals. I gessoed the pages because I wanted to use acrylics, then layered paint, stamping, and collage. For the collage I used an image from a Cherry Republic catalog, some torn strips from a linens catalog, and white tissue paper.

I know it isn't great art, but I am developing a finer sense of what shapes, colors, textures, and so on appeal to me. Lately, I have thought about using the art journals to explore what I'd like to put on canvas. How odd. I never imagined that I would like to paint.