Showing posts with label Pamela Underwood. Show all posts

Monday, January 13, 2014

Stencil on Images journal page, made with Silhouette Cameo

I love Stencil Girl and The Crafters' Workshop, and making my own stencils won't replace their wonderful products; however, I wanted to try making stencils from my own designs so I bought a Silhouette Cameo. For those of you who have never heard of a Silhouette Cameo, it'a small machine that cuts shapes out of paper, vinyl film, card stock, fabric, and some other things, including plastic stencil material. I tried three or four different kinds of stencil materials, none of which worked with the machine, until I found this video on YouTube by Jamie Tardif. She recommended Show Offs stencil blanks, which can be purchased only at Hobby Lobby, and that is what I am using.

I still haven't made a stencil from my own design -- I need some remedial training on Adobe Illustrator or the software that comes with the machine. I did make the beautiful stencil pictured below, though. It's a design that I purchased from Silhouette called Echo Park Doily. The stencil material is not a lovely shade of lavender, that's from the Dylusions spray that I used. Read on ...
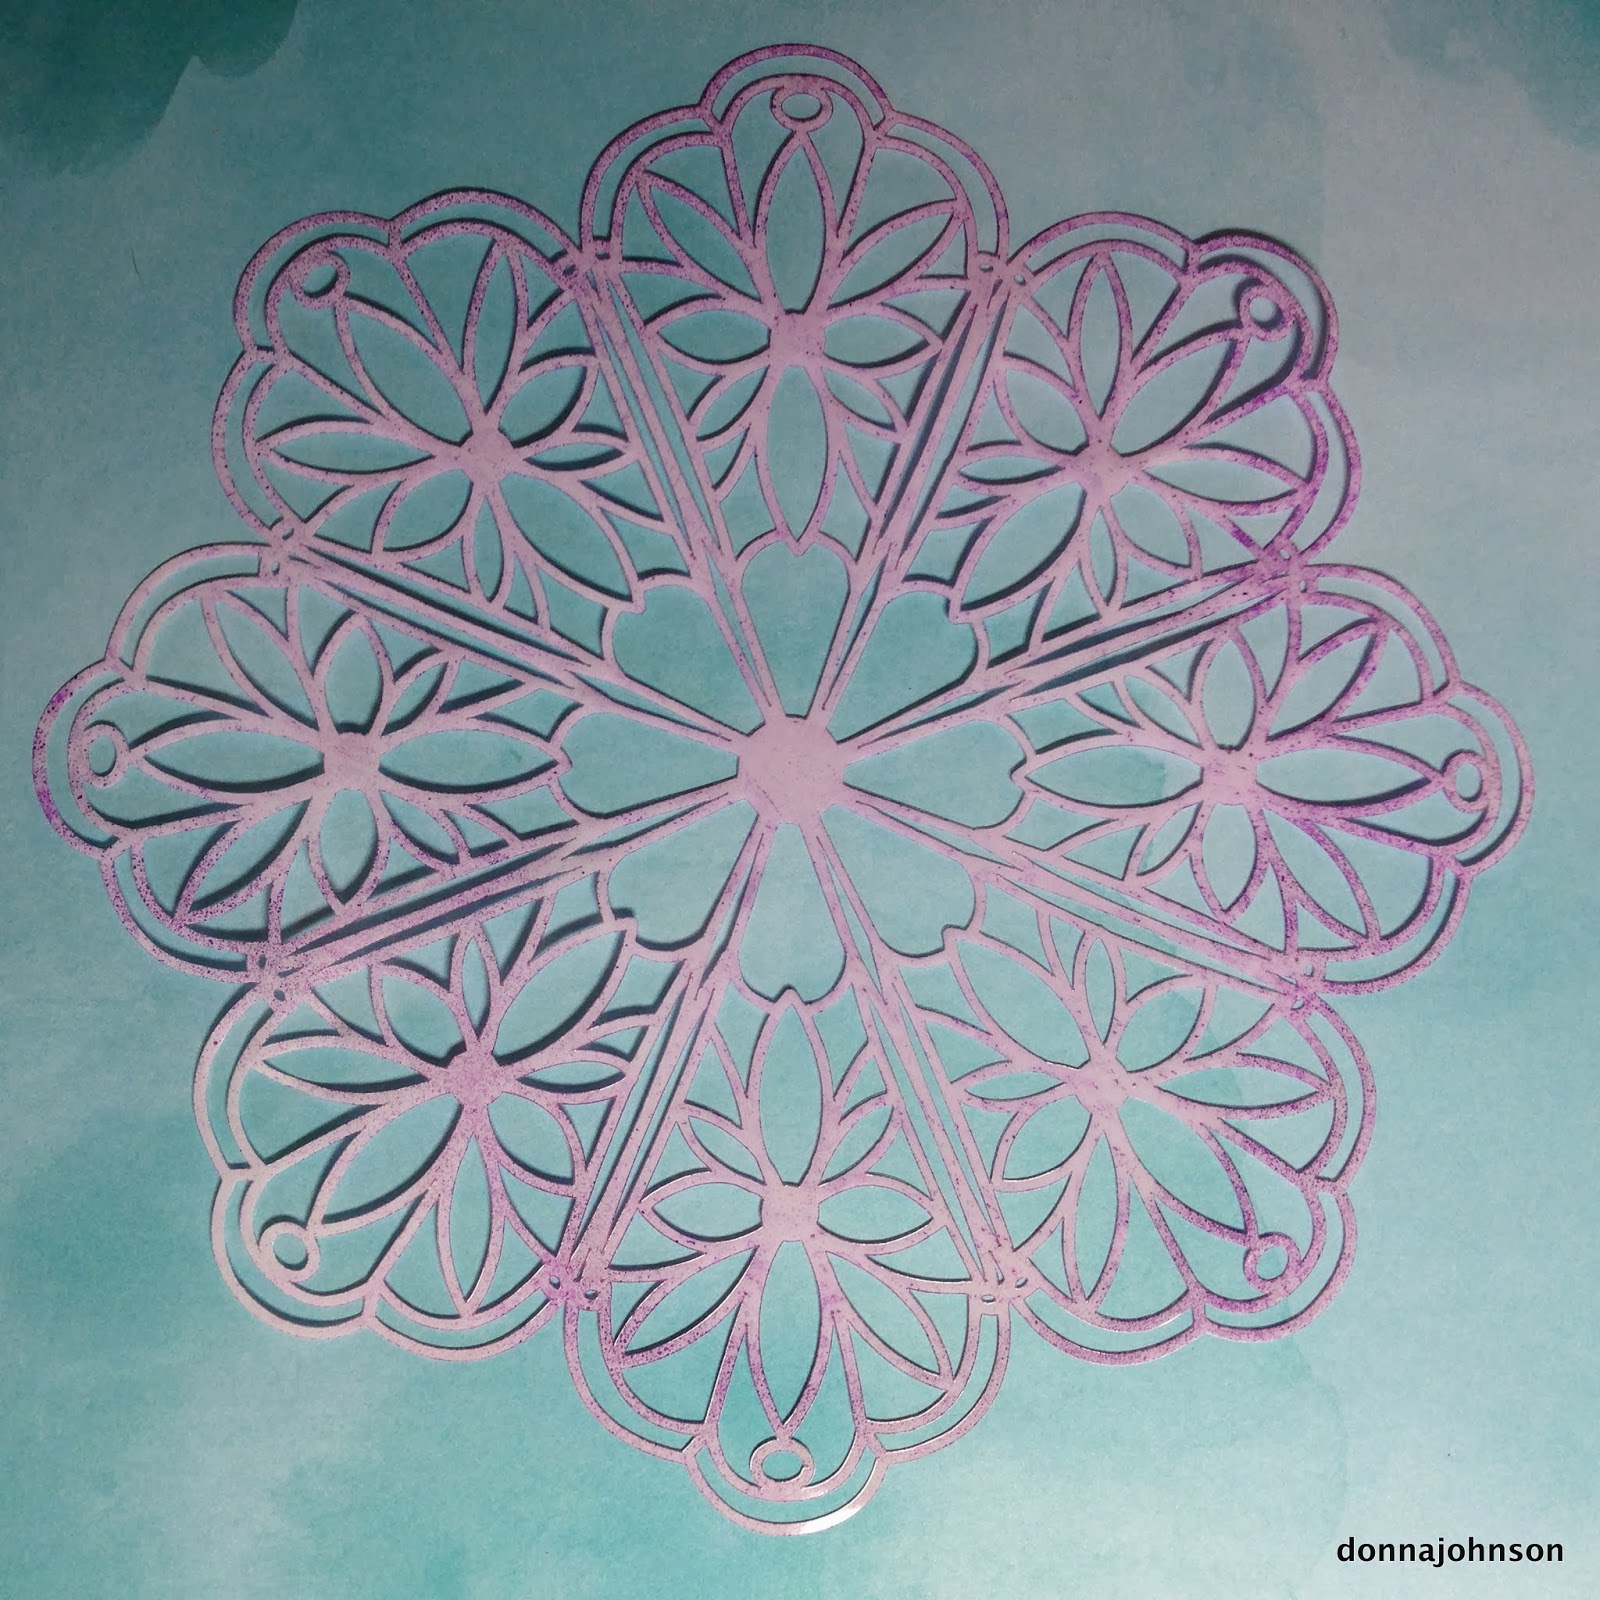
Silhouette Echo Park Doily
I used the chipboard setting on the Silhouette to cut this out. You have to do a lot of fiddling to get the machine set so that it will cut properly. 

Gelli printed collaged deli papers with stencil applied in purple
I put my Images journal in my non-OSHA approved paint booth (cardboard box) and got out the Dylusions Crushed Grape spray ink. You can see the stencil design at the bottom left corner of the top right quadrant. I deliberately sprayed only a part of the stencil. I did not want the doily to be the focal point on the page. I wiped some of it off after I sprayed it.

The page I sprayed on was coated with either Liquitex Liquid Matte Medium or ModPodge, I can't remember. The Dylusions beaded up a bit but I rolled a roll of paper towels over it to pick up the excess.
This design is on the paper towel that I put underneath.
I usually put a paper towel or piece of paper under the object to be sprayed. I have some beautiful papers that started life as a humble drip-catcher. I think I'll try tissue paper the next time I spray.

So there's today's quickie peek into the Silhouette Cameo and stenciling. If you want to learn more, watch Jamie's video (link in first paragraph). You can always leave a comment if you have a question and I'll try to answer it.

Now go make something daring. It doesn't count unless you make a mess.


Sunday, January 12, 2014

Luna moth ghost prints

After I stamped my newly-handcarved luna moth stamp in my Images art journal, there was still plenty of ink left on the stamp. I made a ghost print on a piece of scrapbook paper ...

First ghost print -- scrapbook paper

And I made another ghost print on the back page of the journal …

Second ghost print -- journal page

I was using a brand new ink pad (Stazon Teal Blue) and I really smacked in on the stamp, otherwise I would not have got two such clear images.

Luminarte has a new color in their Silks Acrylics Glazes line called "Moss Green". It looks pretty close to a luna moth color, but it's a glaze. Still looking for an opaque option.

Find some time today to do a little something creative and nourish your spirit; you deserve it.


Wednesday, January 8, 2014

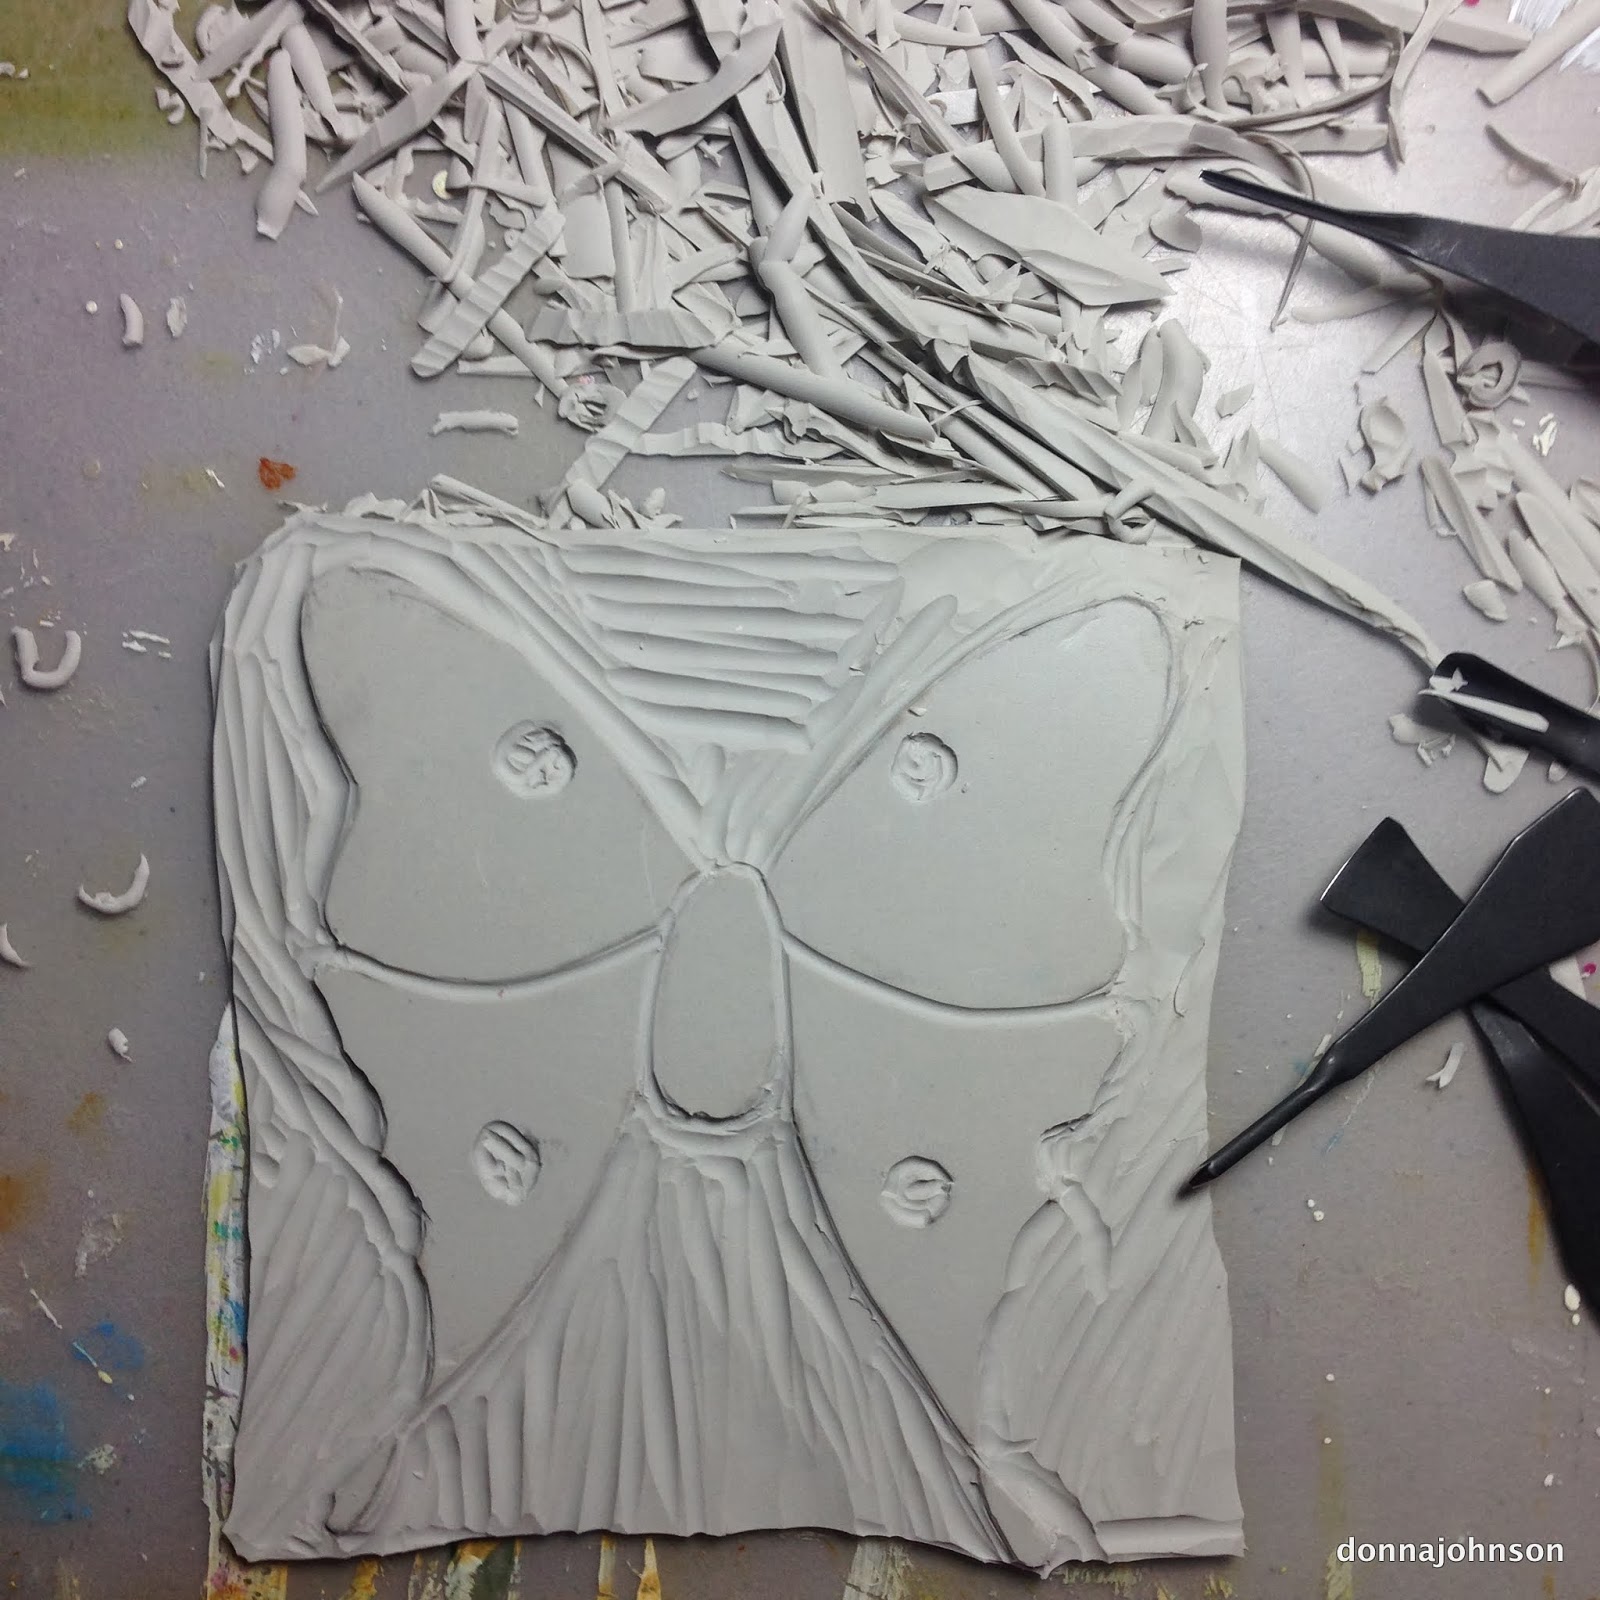
Carving a luna moth stamp

I have had this stamp material with a luna moth drawn on it since April, when I attended Pamela Underwood's "Living with Images as Companions" workshop at her beautiful Turtle Crow Studio in Austin. I finally decided to tackle carving, and learned two (probably more) things.

1 -- It's not that hard and it does not take very long. I spent a total of 45 minutes carving it.
2 -- It's going to take some practice to develop this skill.
3 -- I could get into this! Carving is relaxing and meditative. I listened to Ray Montagne on Pandora and got into my zone.

I am satisfied with the stamp, but it has lots of warts that don't show up well in the photo. Curves are tricky. Removing stamp material cleanly from the edges of the image takes concentration and practice.

Mostly finished

Finished stamp with a few pen details -- stamp pad was a bit dried out.


Now to figure out where to get a luna-moth-green stamp pad. Any ideas?

Update: Someone asked me how I will stabilize this stamp. I don't plan to stabilize it -- I place it flat on a table and ink it, then place the paper on the stamp. It's about 6" tall, and storing a block of wood or piece of foam core that large would take lots of space.


Tuesday, December 18, 2012

Carving a Background Stamp


While shoving strolling through the 2011 International Quilt Festival shopping are, I ran across the colouricious.com exhibit and found this lovely Indian Printing Block. I was delighted to take it home with me, where it sat unused for about a year.

I had an idea that a solid background stamp would add some interest to the original design, and that I should carve this stamp. I was fortunate to attend, also in 2011, Jane LaFazio and Pamela Underwood's Lavender Sage Art Retreat in Austin, TX, where we carved stamps that we designed. Armed with these skills, I jumped right in.

Here's is what I used:
Speedball Carving Set (carving tool and stamp block blank)
tissue paper
oil pastel in light brown color
stylus for tracing
Stayz-on stamp pads in several contrasting colors
Muslin and paper

Original stamp on tissue paper, outlined with oil pastel
First, I stamped the original stamp on tissue paper. (above) I outlined the shape in oil pastel, which is soft and smeary, just what I wanted for this job. I flipped the design over on to a stamp carving blank block and used a stylus to go over the outline. The smeary oil pastel design was transferred to the block. (left) Using my basic little Speedball stamp carving tool, I began removing the portions of the block that I did not want to include in the image. (left)
Here's what it looked like when I finished carving it and slapped a purple stamp pad on it. It was not difficult to carve because I kept the shape simple, and the image stamped beautifully.

What I have learned about the original stamp is that it does not work well on paper (at least not index cards) because the detail is lost, but that it works much better on fabric, although not as well as I would like. I think this might have had do do with the surface upon which I was stamping. I used a dropcloth over a cutting board and it may have been too hard. 
Stamps on index cards, much of the detail stamp is lost.
Background and original stamps on fabric;
better but not as detailed as I would like.
In conclusion, I think I can get the image that I want by stamping on fabric on a padded surface, yet to be determined. If you give this a try, please comment and let us know what worked best for you.

Update: After all my experimentation, I discovered a video on the colouricious.com site that helped immensely: Inspired Block Printing with Jamie Malden.


Sunday, April 1, 2012

What, me watercolor?

Curves & intersections
I've discovered a meditative experience in slowly drawing intersecting curving lines without lifting the pen, then painting the openings with watercolors. No planning, no stress. I just swirl lines and then paint with my kid's box of watercolors. I've used one of these as a tiny journal by writing (in tiny letters) in the openings. It takes about 15 minutes to do one of these, if I dawdle, and when I am finished I have a little abstract painting and more peace than when I started. Give it a try, it's very calming.
It just occurred to me that the seed for this process was planted at a retreat I attended last fall in Austin, TX at Turtle Crow Studio. Jane LaFazio and Pamela Underwood are wonderful teachers, and one of our exercises was a continuous line drawing of a rock cairn near the studio. Thanks, Jane & Pamela!

Wednesday, October 5, 2011

Lavender Sage Art Retreat

Four days with 10 wonderfully creative women, making art in a beautiful studio in the Texas hill country with two amazing teachers. Wow! We learned about monoprinting, collage, sketching, watercolor painting, blind contour drawing, continuous line contour drawing, image transfer, journaling, making a box, and best of all we learned about ourselves as artists. We visited art galleries, ate some great barbecue and Mexican food, and our chef Tess fed us very well at the Studio. We spent time sketching at the Lady Bird Johnson Wildflower Center. I am truly grateful for the connections that we made with each other, and for the opportunity to observe such talented artists. Oh, and I had all kinds of fun, too!

Next Lavender Sage Art Retreat is in April, 2012.

Thanks to Sona for lunch and a visit to her beautiful home and studio on Monday. What a treat! From Sona's Colleen and I went to S. Congress to visit Uncommon Objects and Tesoros where we managed to acquire even more "stuff" than we did in Salado. By then we needed a snack and hit Guero's down the street before we left for Oklahoma, where we arrived home about 1:30am. Tired but happy.

I have posted my photos to MobileMe and I'll upload to the flickr group soon. Here's one of my favorites from the Wildflower Center. I believe this is Texas sage; it was blooming everywhere.